Footer Info particle
Create footer info with logo, content and social icons to present your business info. See live Demo Page.
# Footer Info Package contents
| Files | Description |
|---|---|
| jlfooterinfo.yaml | Contains the Footer Info particle settings. |
| jlfooterinfo.html.twig | The Twig file to pull information, settings. |
Installation Installing the particle on your website is a really simple process. You can refer to the document here to know more.
Requirements Footer Info requires Uikit 3 for Gantry 5 Atom to be installed and enabled in your theme layout settings.
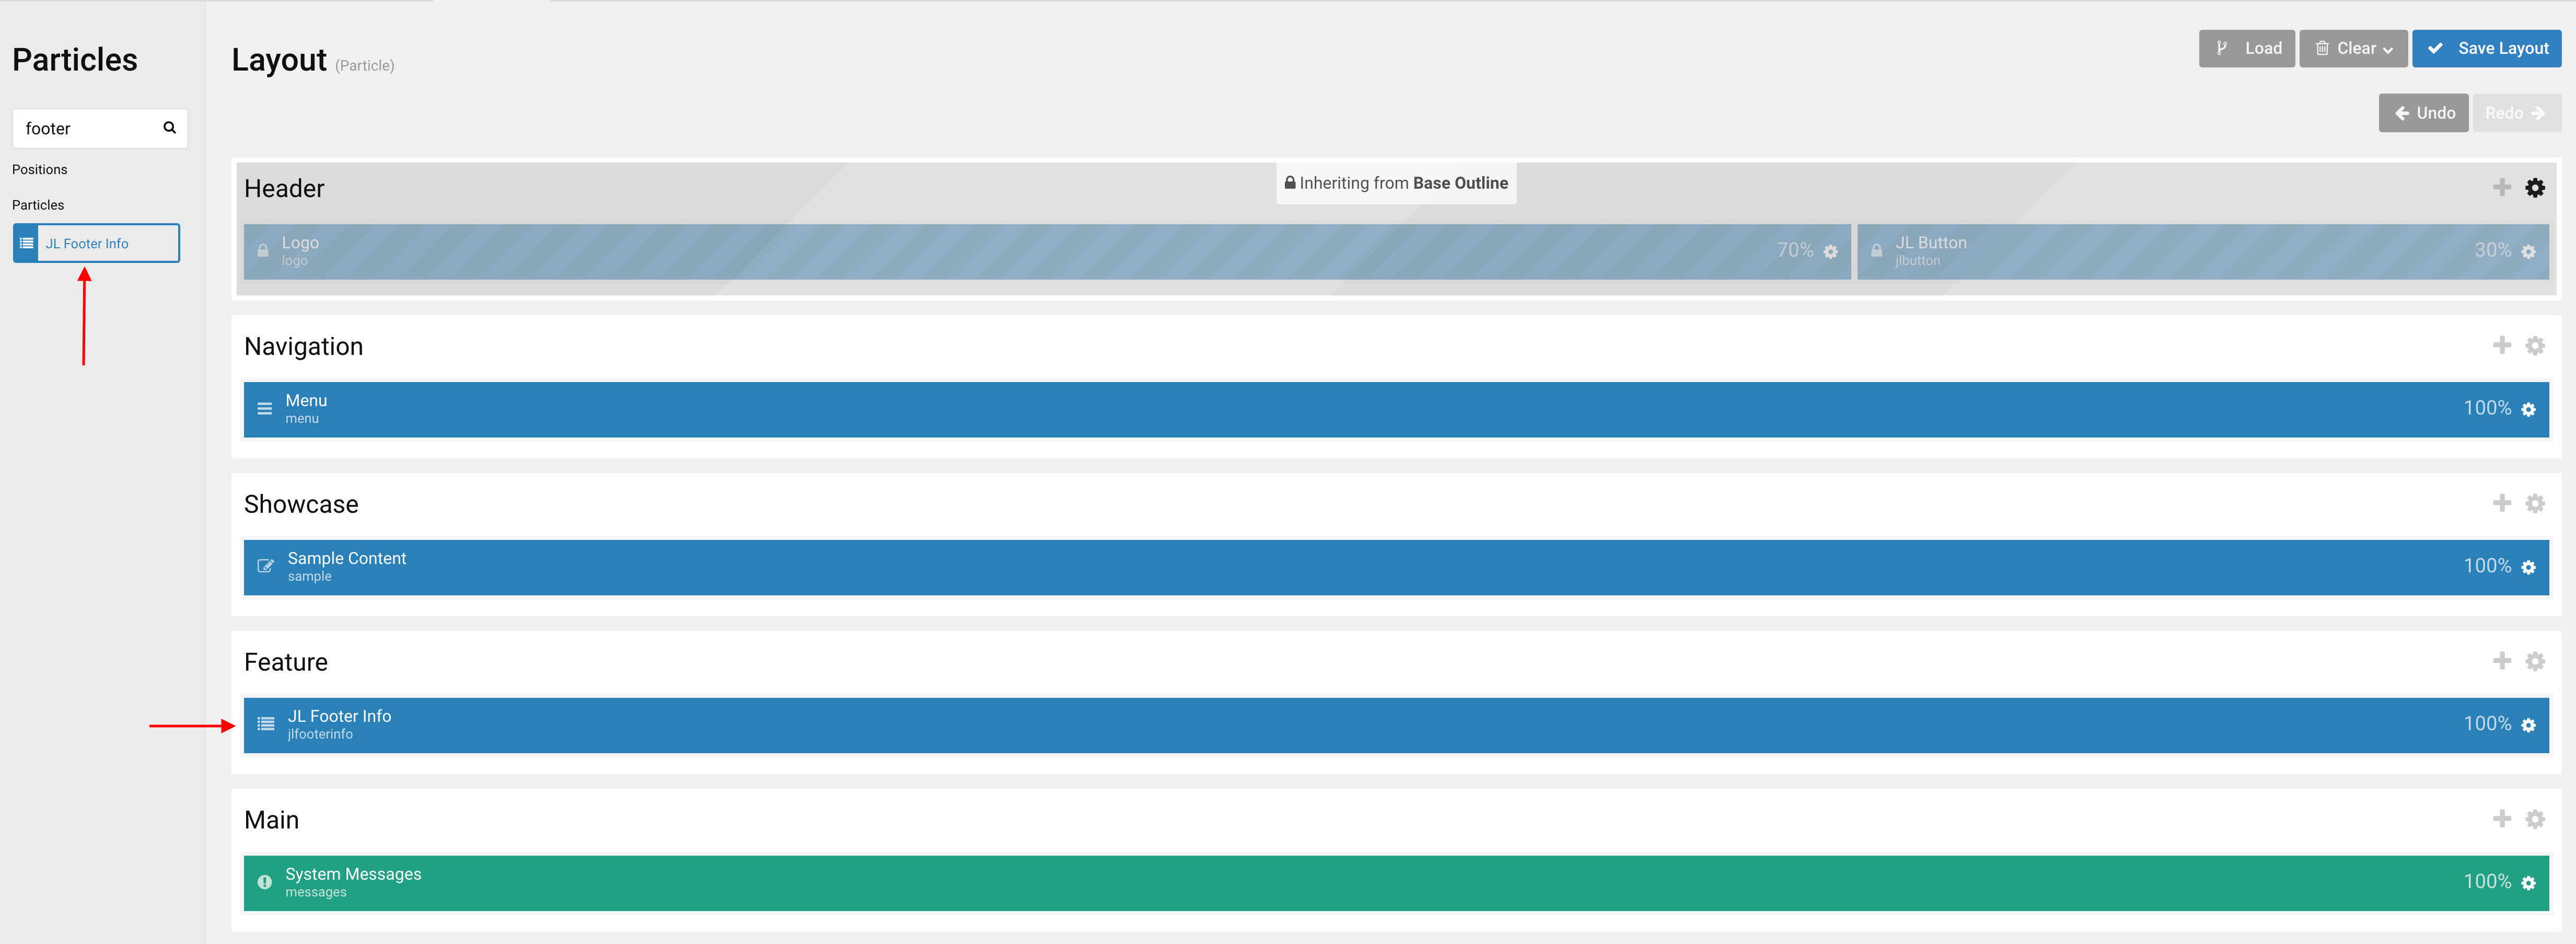
Go to Template/Theme Settings > select the Layout to add Footer Info particle (i.e: Home) -> Layout tab -> Drag and drop the Footer Info from Particles panel (left corner) to the section you want to display the particle.

Settings

| Settings | Description |
|---|---|
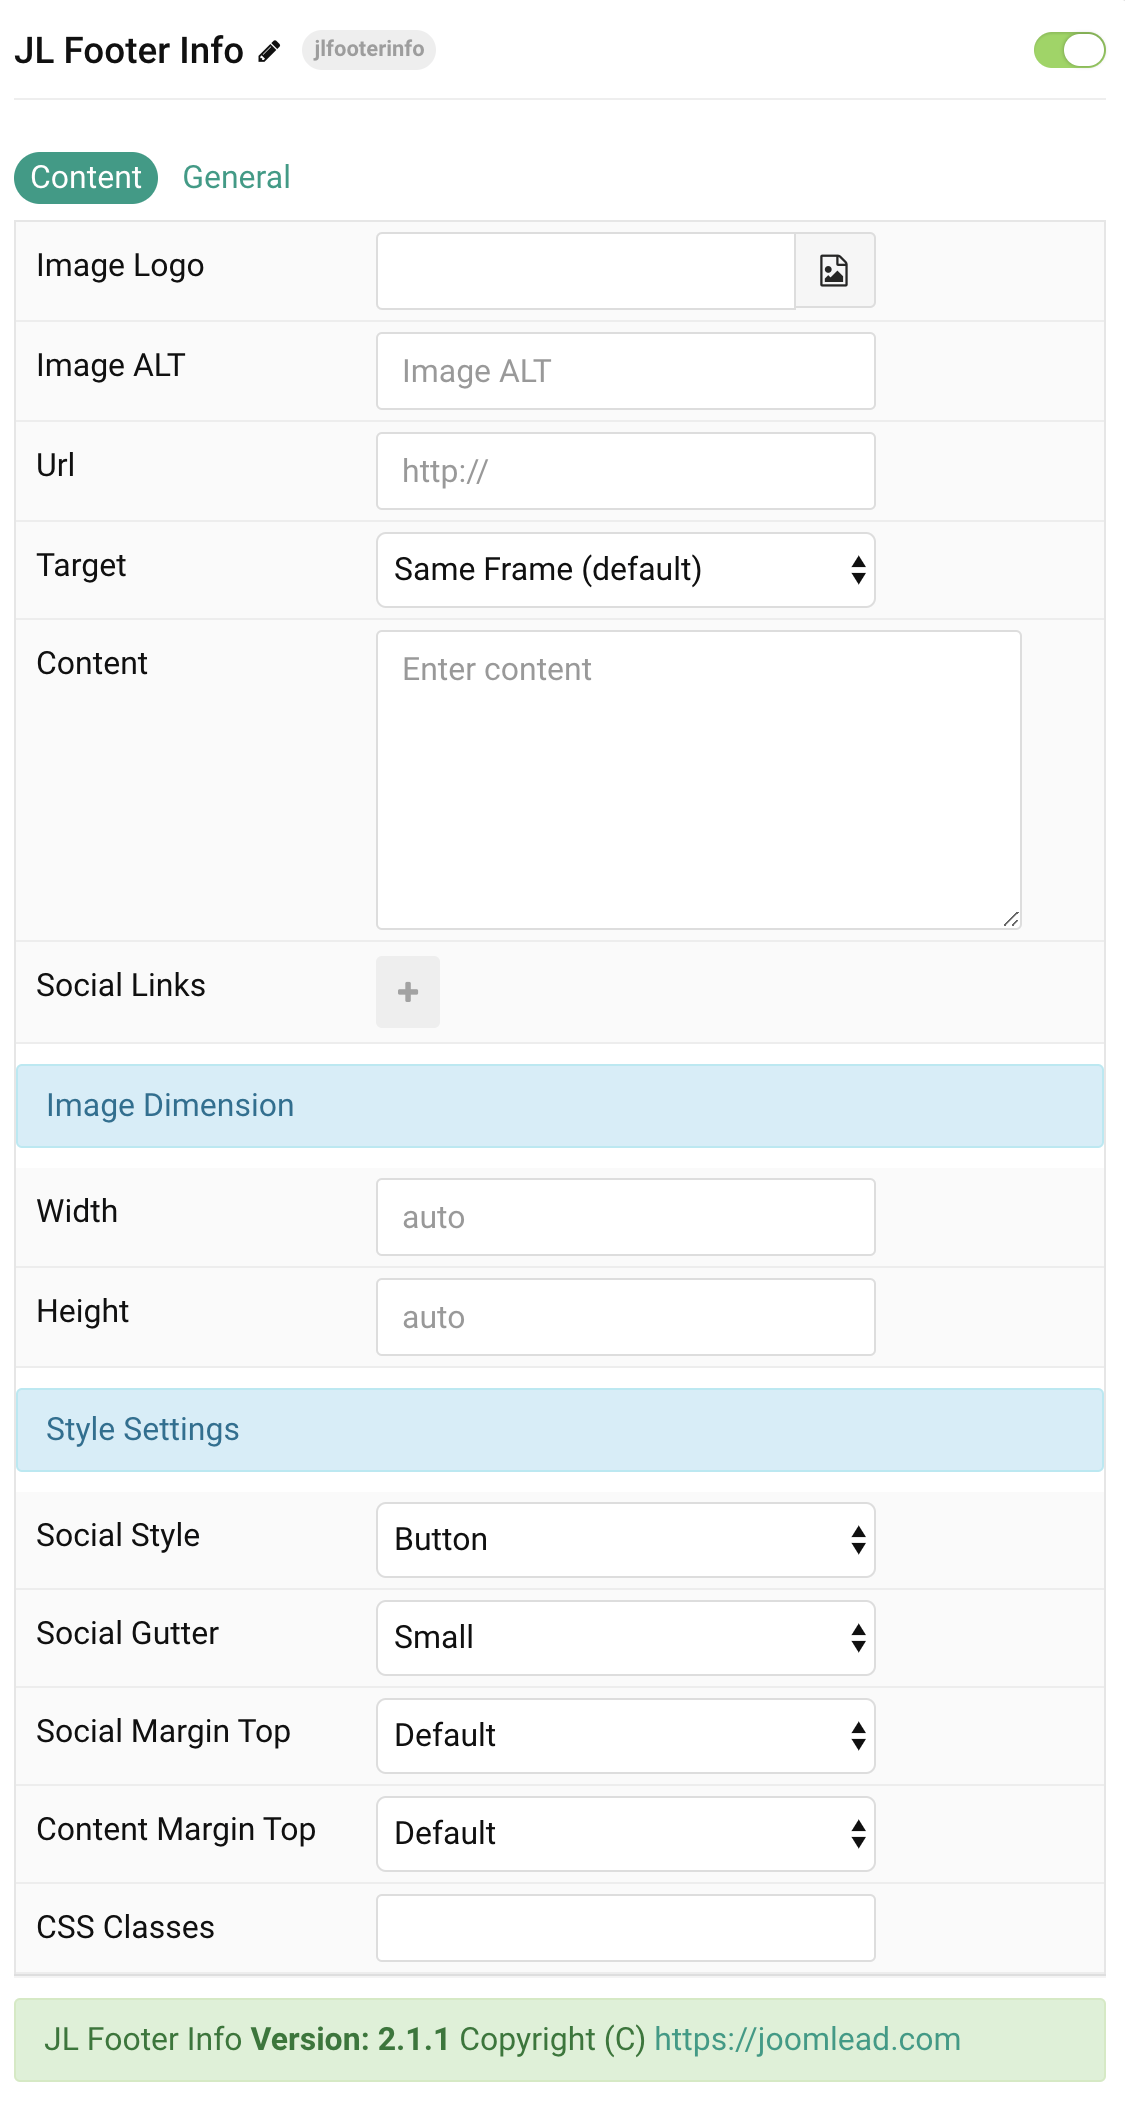
| Image Logo | Select desired logo image. |
| Image Alt | Input logo description text. |
| Url | Url for the image. Leave empty to go to home page. |
| Target | Target browser window when logo is clicked. |
| Content | Customize the content. |
| Social Links | List Contact info items to display. You can add new items to the collection using the plus + icon |
| Image Dimension | Set image width/height. |
| Width | Set the width of the image. |
| Height | Set the height of the image. |
| Style Settings | Common style settings |
| Social Style | Select the subnav style. |
| Social Gutter | Set the grid gutter width. |
| Social Margin Top | Set the top margin. Note that the margin will only apply if the content field immediately follows another content field. |
| Content Margin Top | Set the top margin. Note that the margin will only apply if the content field immediately follows another content field. |
| CSS Classes | CSS class name for the particle. |
General, Parallax and Parallax Background tab
Please take a look the documentation here for more detail about these tabs settings


Comments