
Newsletter particle documentation
# Newsletter Package contents
| Files | Description |
|---|---|
| jlnewsletter.yaml | Contains the Newsletter particle settings. |
| jlnewsletter.html.twig | The Twig template used to render the Newsletter form. |
Installation Installing the particle on your website is a simple process. You can refer to the document here to know more.
Requirements Newsletter requires Uikit 3 for Gantry 5 Atom to be installed and enabled in your theme layout settings. JL Newsletter also requires JL Connector.
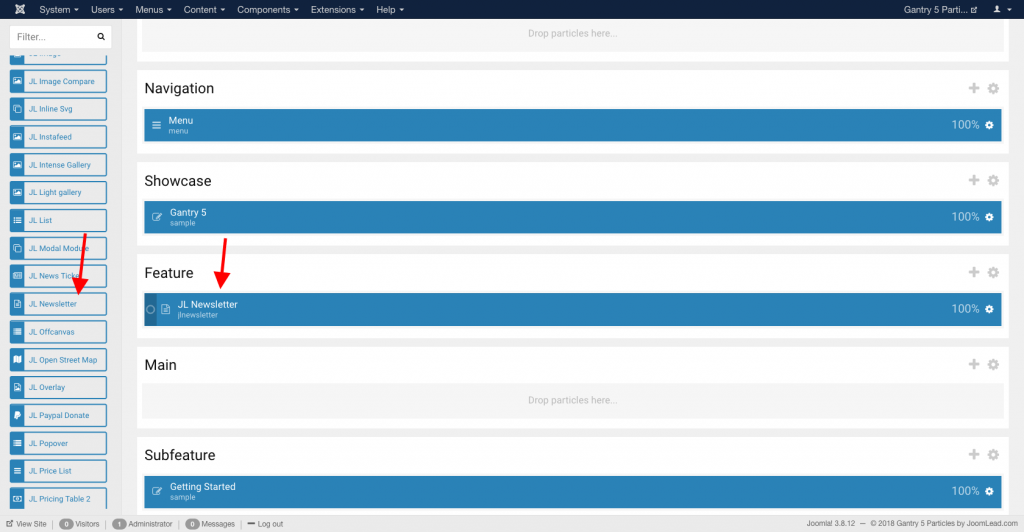
Go to Template/Theme Settings > select the Layout to add Newsletter (i.e: Home) → Layout tab → Drag and drop the Newsletter Particle from the Particles panel to the section where you want to display the form.
JL Connector
JL Connector handles the communication between your website and Mailchimp. Your Mailchimp API credentials are configured in JL Connector and are not entered into the Newsletter particle or exposed to frontend JavaScript.
Install JL Connector
Joomla
- Download the JL Connector package for Joomla.
- Go to System → Install → Extensions.
- Upload and install the JL Connector package.
- Go to System → Plugins.
- Find JL Connector and enable it.
WordPress
- Download the JL Connector package for WordPress.
- Go to Plugins → Add New Plugin → Upload Plugin.
- Upload and install the JL Connector ZIP package.
- Activate the JL Connector plugin.
- Open the JL Connector settings.
Grav
- Install JL Connector as a Grav plugin.
- Enable JL Connector from Grav Admin.
- Make sure the required Grav API integration is installed and enabled.
- Open the JL Connector configuration.
Configure Mailchimp
Configure your Mailchimp credentials in JL Connector before using the Newsletter particle.
| Setting | Description |
|---|---|
| Mailchimp API Key | Enter the Mailchimp API Key used by JL Connector to communicate with Mailchimp. |
| Allowed Audience IDs | Add the Mailchimp Audience IDs that are allowed to be used by JL Newsletter. The Audience ID selected in the particle must be included here. |
Settings
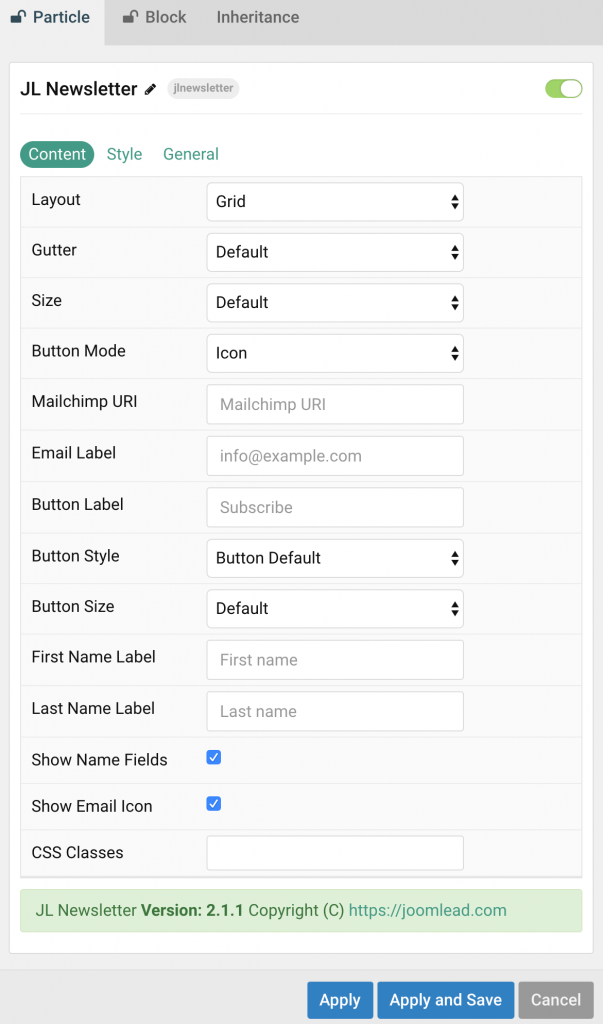
Content
| Settings | Description |
|---|---|
| Mailchimp Audience ID | Enter the Mailchimp Audience ID used for subscriptions. This Audience ID must also be included in the Allowed Audience IDs configured in JL Connector. |
| Double Opt-in | Enable Mailchimp double opt-in. When enabled, the subscriber must confirm the subscription using the confirmation email sent by Mailchimp. |
| After Submit | Select what happens after a successful subscription: Show Message or Redirect. |
| Success Message | Customize the message displayed after a successful subscription when After Submit is set to Show Message. |
| Redirect URL | Enter the URL to open after a successful subscription when After Submit is set to Redirect. |
| Layout | Define the layout of the newsletter form. |
| Gap | Set the gutter between form fields. |
| Size | Set the size of the form fields. |
| Form Style | Select the input style used by the form. |
| Email Label | Customize the email field label. |
| Button Label | Customize the submit button label. |
| First Name Label | Customize the first name field label. |
| Last Name Label | Customize the last name field label. |
| Show First Name | Show or hide the first name field. |
| Show Last Name | Show or hide the last name field. |
| Show Email Icon | Show or hide the email icon. |
| Button Mode | Select whether to display a normal submit button or a clickable icon inside the email input. |
| Button Style | Set the submit button style. |
| Button Size | Set the submit button size. |
| Full Width Button | Make the submit button use the full available width. |
| CSS Classes | Add custom CSS class names to the particle. |
Style Tab
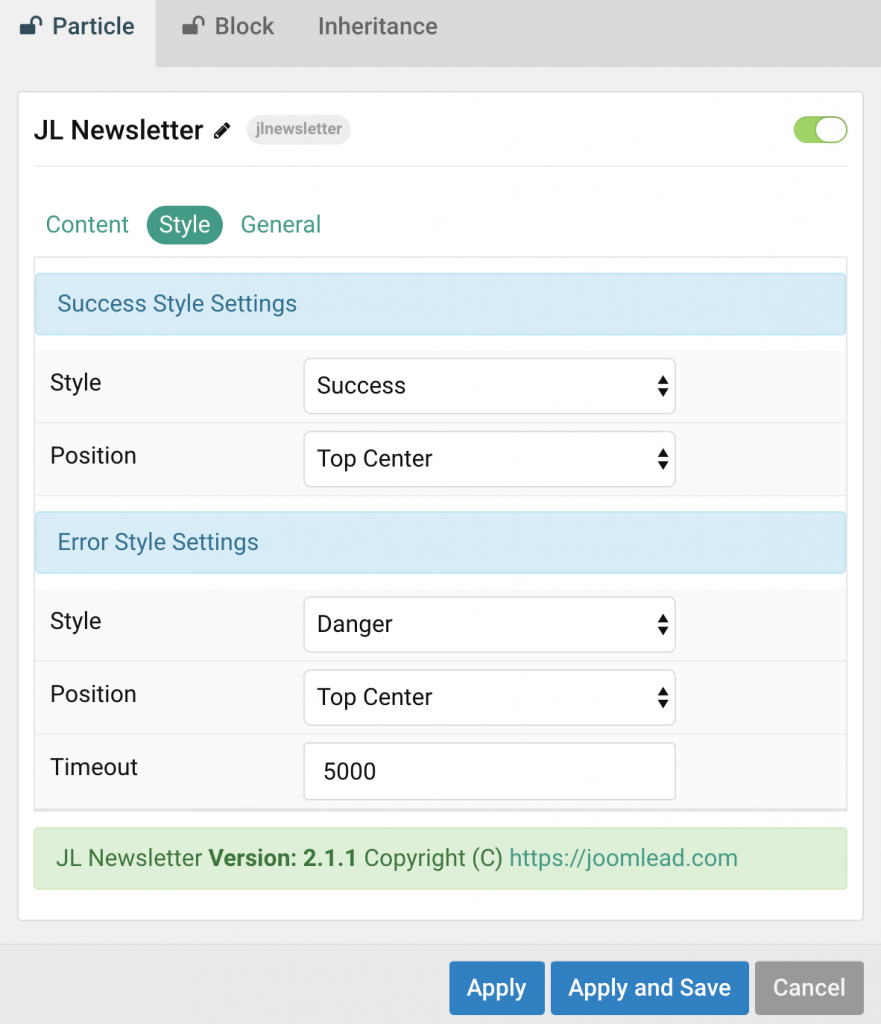
The Style tab controls the success and error notifications displayed by the Newsletter particle.
Success Notification
| Settings | Description |
|---|---|
| Style | Set the style of the success notification. |
| Position | Set the position of the success notification. |
Error Notification
| Settings | Description |
|---|---|
| Connection Error Message | Customize the fallback message displayed when the newsletter service cannot be reached. |
| Error Style | Set the style of the error notification. |
| Error Position | Set the position of the error notification. |
| Timeout |
Set how long the notification remains visible.
Use 0 to keep the notification visible until it is dismissed.
|
General Tab
Please take a look at the documentation here for more detail about the common General tab settings.
Upgrade from Previous Versions
- Install and enable JL Connector.
- Enter your Mailchimp API Key in JL Connector.
- Add the required Mailchimp Audience ID to Allowed Audience IDs.
- Update JL Newsletter to the current version.
- Open your existing Newsletter particle.
- Replace the old Mailchimp URI configuration with the Mailchimp Audience ID.
- Configure Double Opt-in and After Submit options as required.
- Save the particle and test a subscription from the frontend.
Troubleshooting
The form does not submit
- Make sure JL Connector is installed and enabled.
- Check that the Mailchimp API Key configured in JL Connector is valid.
- Make sure the selected Audience ID is included in Allowed Audience IDs.
- Make sure the Newsletter particle has a valid Mailchimp Audience ID.
- Make sure your server can make outbound HTTPS requests.
Audience ID is rejected
The Audience ID configured in the Newsletter particle must be included in Allowed Audience IDs in JL Connector.
The subscriber does not appear immediately
If Double Opt-in is enabled, Mailchimp sends a confirmation email. The subscriber must confirm the subscription before becoming an active subscriber.
Success or error notification is not displayed
- Check the selected notification style and position.
- Check that another element is not covering the notification.
- Check the browser console for unrelated JavaScript errors.
- Test the particle without custom JavaScript overrides.
Redirect does not happen
- Set After Submit to Redirect.
- Check that the Redirect URL is valid.
- Test the URL directly in a browser.

Comments